Hey there dragons!
With the QuickSwap DEX now operating across 3 of the most popular, high-performance chains in Web3, learning how to switch between networks from your Web3 wallet is more important than ever. Today, we’ll be breaking down what it means to change your RPC, and how easy it is to do in a few short clicks.
What’s in it for you? Good question…
You’ll be able to seamlessly switch between Polygon zkEVM’s epic speeds, Dogechain’s cool memes, and good ole’ Polygon PoS, so you can enjoy all the best that DeFi has to offer without pulling your hair out every few hours.
So What’s an RPC, Anyway?
First of all, RPC stands for “Remote Procedure Call,” which is a process where a computer program causes a procedure to execute in a different address space.
So what does all that tech lingo mean for Web3 users? RPCs allow users to execute transactions on different networks – or as we say, on different chains.
PoS and zkEVM are some of the most advanced chains in town, so many users may want to continuously switch between them to use dApps like QuickSwap and explore what DeFi has to offer.
No sweat! It’s as easy as pie when you know how to change your RPC like a pro.
Changing Your RPC Like a Pro (With Screenshots!)
To change your RPC and begin transacting on a different chain, you’ll need to log into your Web3 wallet. For the purposes of simplicity, we’ll be using Metamask’s latest UX/UI for example.
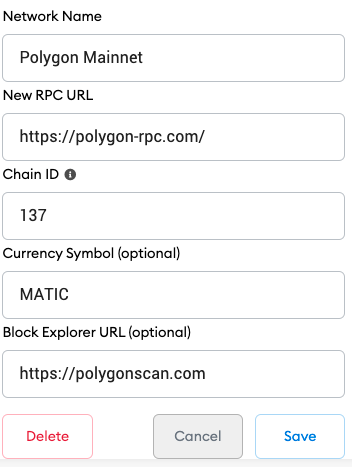
Before we begin, here’s a list of RPCs that you’ll need to use QuickSwap:
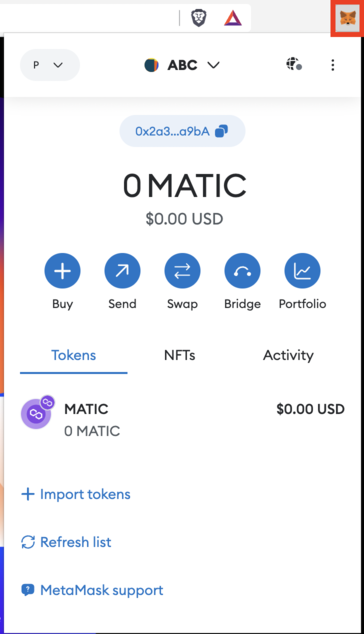
Step 1: Open your wallet in your browser by clicking the wallet icon.

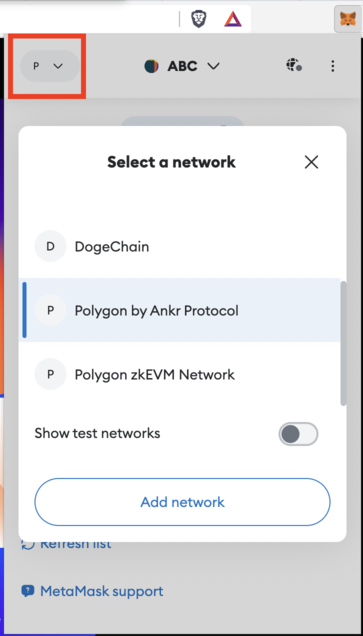
Step 2: Click on the dropdown menu in the upper right corner to view networks.

Step 3: Select your network from the dropdown menu, or click “Add network” to enter RPC information manually.

That’s it! It’s as simple as 1-2-3!
Now, what are you waiting for Dragons? Get back out there on zkEVM and let Polygon and QuickSwap bring the best of DeFi to you!